Ocean Inspired Craft Ideas & Activities for Kids
- Monday 10th July 2023
- Activities
Here at SEA LIFE Sydney Aquarium we are constantly inspired by the amazing array of creatures that call the ocean home. With that in mind we have compiled a list of creative craft ideas for your kids, with the hope that they too will be inspired by their ocean dwelling friends.
From Sharks to Seahorses, Octopus to tropical fish, we hope these creative craft ideas will inspire them, or at the very least keep them entertained on a wet weekend when you’re at your wits end and need to keep them engaged while you enjoy some well earned relaxation time.
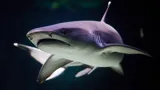
Shark Paper Craft Activity
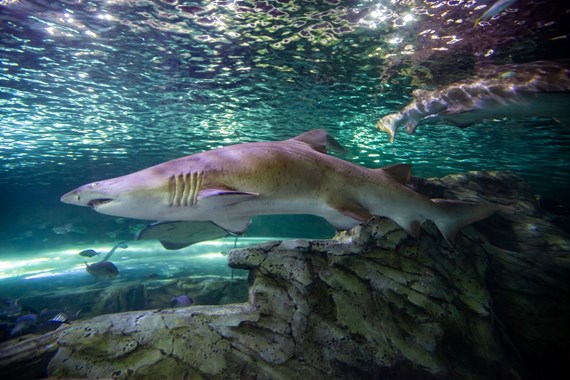
Looking for a JAWSOME craft activity to share with your family? We have the perfect one for you! Follow along with our video and make this adorable, snappy shark craft!
WHAT YOU'LL NEED:
- Plain or scrap paper
- Dark Blue Cardstock
- Light Blue Cardstock
- Orange Cardstock
- Scissors
- Matchstick
- Googley Eyes
- Glue stick
- Peg
- Sticky tape
HOW TO MAKE YOUR SHARK PEG PAPER CRAFT:
- Draw a rounded shark body shape on a scrap piece of paper. Have one fin attached to the drawing and one kept separate. Draw a line straight through the middle of your shark body - this will be where you cut so the peg can move.
- Cut out your drawing and trace it onto coloured cardstock. To make your shark more colourful use different colours for the top and bottom of your shark.
- Now cut the traced shark shapes out from the coloured cardstock
- On your orange cardstock, draw a small fish shape and cut this out.
- Now to put it all together! Stick the lose shark fin onto the sharks body.
- Flip the bottom half of the sharks body over and stick a matchstick to the end of it. Now attach your small orange fish to the other end of this matchstick.
- Now secure your shark body pieces to the peg. Make sure that you have the top and bottom secured on separate legs of the peg so the sharks mouth can open and close.
- Now add a googley eye to your sharks face and you are done!
Original step by step created by: Kixcereal
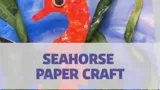
Seahorse Paper Craft Activities for Kids
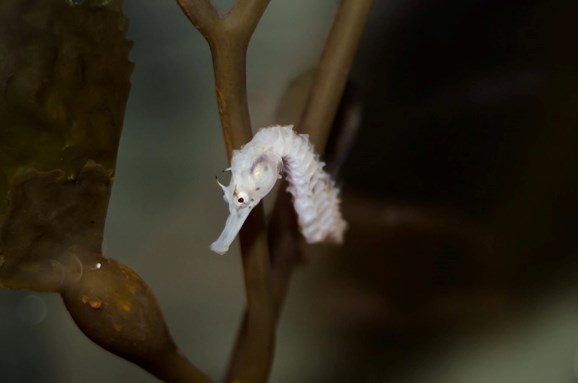
Looking for a FIN-tastic seahorse craft to make with your family? We have you covered! Follow along with our video and make adorable seahorse art!
WHAT YOU'LL NEED:
- Plain Cardstock
- Colourful Paints
- Paint Brushes
- Scissors
- Newspaper
- Googley Eyes
- Glue stick
HOW TO MAKE YOUR SEAHORSE CRAFT:
- Draw your seahorse then flip the paper over and add some colour! Set it aside and let it dry.
- Grab a second piece of paper and paint it like the ocean. Set it aside and let it dry.
- Now take the newspaper and rip it up into long strips.
- Paint these strips on both sides green like seaweed. Set them aside to dry.
- Take your seahorse paper and cut along your drawn seahorse outline.
- Now it is time to stick it all together! Take your painted blue piece of paper, twist the green seaweed and twist it and then secure it with glue on either end. Repeat this with as many seaweed strips as you would like.
- Lastly stick your colourful seahorse in the middle of the artwork!
- Display your seahorse craft on your fridge or on your wall to add a little piece of the ocean to your home.
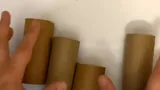
Recycled Toilet Roll Craft
Wondering what to do with all your spare empty toilet paper rolls? We have the perfect at home craft to do with your kids!
WHAT YOU'LL NEED:
- Recycled Toilet Rolls
- Colourful Paints
- Paint Brushes
- Scissors
HOW TO MAKE YOUR TOILET ROLL FISH:
- LET'S PAINT!
Paint your toilet roll any design you would like! - FOLD FOLD FOLD!
Fold your toilet roll in half so it is flat - CUT YOUR FISH
Now cut your toilet roll into the shape of a fish. Don't forget the tail! - FACE TIME
Add details to your toilet roll so you now have a cut fishy face! And you are done!
Sea Turtle Paper Plate Craft
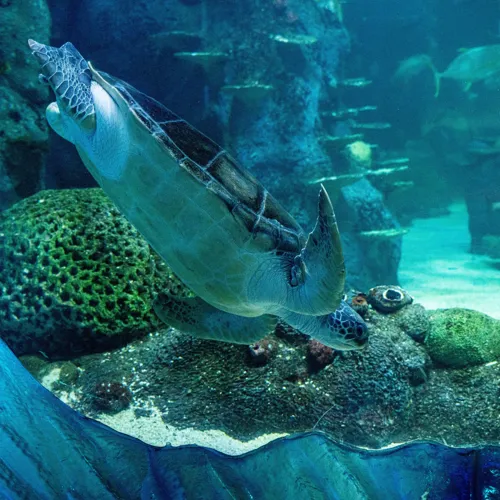
It is time to get crafty! Did you know that sea turtles live in almost everyone ocean in the world! Here at SEA LIFE Sydney we have 3 large sea turtles, Myrtle, Dave & Chong!
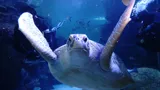
Follow the steps below to make your own paper plate sea turtle and bring some of our aquarium to your home!
WHAT YOU'LL NEED:
- Coloured cardstock
- Scissors
- Tape
- Paper plates
- Coloured tissue paper
- Black marker
- Glue
- Paint
HOW TO MAKE YOUR PAPER PLATE SEA TURTLE:
- Draw the body!
Turtles have a head, tail and 4 flippers so you will need to draw each of these body parts onto the cardstock. Then cut them out! - Paint the shell!
Take your paper plate and cover it in whatever colour paint you would like! make sure you get all the little cracks filled in so your turtle is nice and bright. Then sit your plate aside to dry - Tissue paper time!
While your shell drys, cut your tissue paper. Cut the coloured tissue into lots of small squares - Put it all together!
Now that you have all the pieces of your turtle it is time to put it all together. Flip the paper plate over and tape your turtle body parts to the underside. Next flip your shell back over and stick your tissue paper squares all over the top of the shell to represent the turtle shell pattern. - Add the face!
Take the marker and draw your turtle eyes and mouth and you are done!
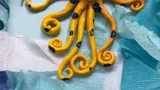
Blue-ringed octopus craft

Dive into craft this weekend with our adorable blue-ringed octopus clay activity! Did you know the blue-ringed ocotpus is one of the most deadly creatures in the ocean!
Follow the steps below to make your own clay blue-ringed octopus and bring some of our aquarium to your home!
WHAT YOU'LL NEED:
- Air-drying clay
- Paint
- Paintbrushes
HOW TO MAKE YOUR CLAY BLUE-RINGED OCTOPUS:
- Mold the head
Grab a small hand-full of clay and roll it into a long oval shape. This will be the head of your octopus. - Make the legs!
An ocotpus has 8 long legs. Roll out 8 thin pieces of clay and twist and curl them so they look like a ocotpus legs. Then secure them to the head of the octopus. You can use a little bit of water to help them stick if you need. - Add the eyes.
To make your ocotpus a little cuter, add two large eyes to the front of your ocotpus head. Roll two small balls of clay and press them on. - DRY DRY DRY!
Wait about 1 day for your clay to dry. Sit it in a nice warm sunny spot to help the process. - Painting time
Now it is time to get colourful! Take your paints and cover your ocotpus in whatever colour you would like! And you are done!
Looking for more Creative Craft Inspiration to keep the kids entertained?
Check out some of these inspiring ideas:
Build Your Own Aquarium at HomeOnline From
$39
Per Adult
On The Day
$57
Per Adult
- Price includes Digi Photo Pass with 8 digital photos included – valued at $26!
- Get your ticket on your phone
- Children under 16 years of age must be accompanied by an adult (18+)
- Guarantee entry by booking online
-
Ticket Type Weekdays Weekends School Holidays & Public Holidays On the day Advanced On the day Advanced On the day Advanced Adult $49.00 $39.00 $57.00 $45.00 $57.00 $53.00 Child $42.00 $26.00 $42.00 $33.60 $42.00 $40.00 Concession $43.00 $29.00 $48.00 $38.40 $48.00 $48.00 Child (0-1 yrs) FREE *All concession holders must have a valid concession/student/health care card to gain access to the attraction with a Student/Senior ticket.
*Please note peak includes school holidays from other Australian states and public holidays.
Please note: Our ticket pricing is subject to available capacity and prices may fluctuate during periods of high demand.
Online From
$49
Per Adult
When Bought Separately
$106
Per Adult

- Choose from: WILD LIFE Sydney Zoo, Madame Tussauds Sydney or Sydney Tower Eye
- Visit your second attraction within 60 days after you have visited SEA LIFE
- Price includes Digi Photo Pass with 8 digital photos included
-
Savings percentages are based on the maximum cost of purchasing individual entry tickets for each attraction when compared to purchasing a combo pass for the same date type (e.g. peak/off-peak, advance/on-the-day purchase).
Online From
$54
Per Adult
When Bought Separately
$155
Per Adult

- Choose from: WILD LIFE Sydney Zoo, Madame Tussauds Sydney or Sydney Tower Eye
- Visit your other attractions within 60 days after you have visited SEA LIFE
- Price includes Digi Photo Pass with 8 digital photos included
-
Savings percentages are based on the maximum cost of purchasing individual entry tickets for each attraction when compared to purchasing a combo pass for the same date type (e.g. peak/off-peak, advance/on-the-day purchase).